What is OpenClaw and How Does It Work on Unraid
OpenClaw is an AI assistant you can chat with on Telegram, Discord, or WhatsApp. You install it on your own server and it handles tasks and questions for you automatically.
Unraid wipes any software you install directly when it restarts. So you put OpenClaw inside a small Linux virtual machine instead. That keeps your agent running safely across every reboot.
What You Need Before Start
| What You Need | Details |
|---|---|
| Unraid version | 6.9 or newer |
| Processor | Must support virtualization - Intel VT-x or AMD-V (enabled in BIOS) |
| RAM for the VM | 2GB minimum, 4GB is better |
| Storage for the VM | At least 20GB of free space |
| VM operating system | Ubuntu 22.04 LTS (recommended for beginners) |
| Node.js | The OpenClaw installer takes care of this automatically |
| AI provider API key | You need one from Anthropic, OpenAI, Google, or similar. New to OpenClaw? See what is OpenClaw. |
| Network setting | Set VM to Bridge mode so it gets its own IP address |
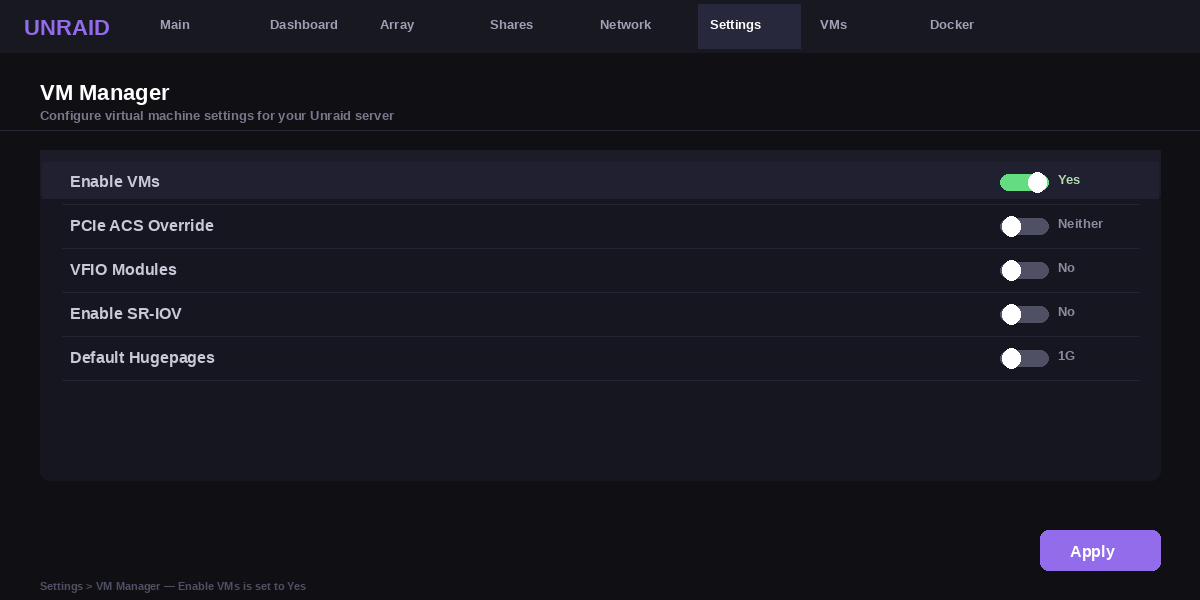
Step 1: Make Sure VMs Are Turned On
Log into your Unraid dashboard and go to the top menu. Click Settings, then click VM Manager. Look for the option that says Enable VMs and set it to Yes. Click Apply to save.
If this option is greyed out or not working, you may need to go into your server BIOS first and turn on Intel VT-x (Intel processors) or AMD-V (AMD processors). This setting allows your server to run virtual machines.
Step 2: Download an Ubuntu ISO
Go to ubuntu.com and download Ubuntu 22.04 LTS. Once downloaded, upload the ISO file to your Unraid server. In the Unraid dashboard, go to the Main tab, find your ISOs share, and upload the file there.
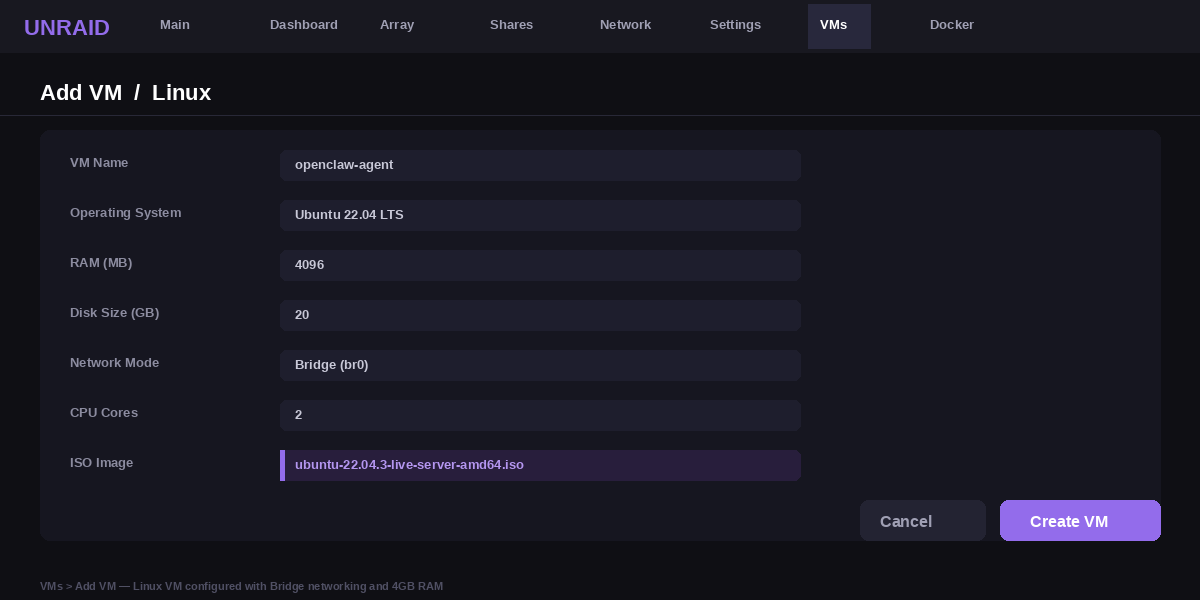
Step 3: Create a New Linux VM
Click the VMs tab in Unraid. Click Add VM and choose Linux. Fill in these settings:
- ISO: select the Ubuntu file you uploaded
- RAM: set to 4096 MB (4GB)
- Disk size: 20GB or more
- Network: change to Bridge
Click Create, then start the VM. Go through the Ubuntu installation steps. When it is done, restart the VM and log in.
Step 4: Open a Terminal Inside the VM
In the Unraid VMs tab, click on your VM and open the VNC console. This is like a screen and keyboard for your VM. You can also SSH into the VM from your computer if you prefer. To find the VM IP address run:
ip addr show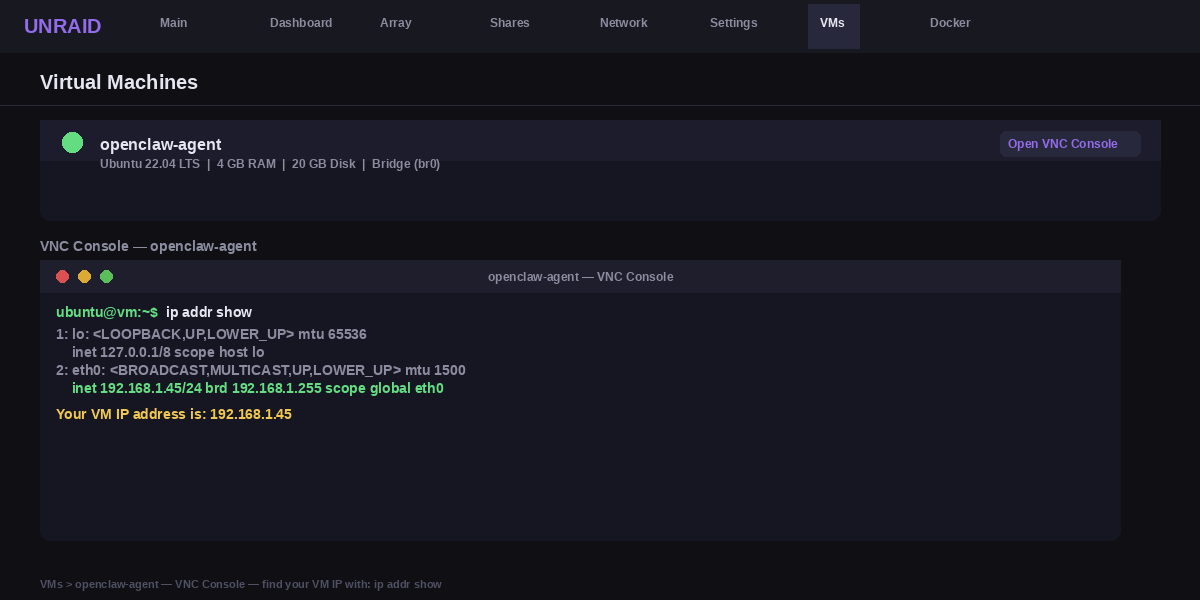
Step 5: Install OpenClaw
Copy and paste this command into the terminal inside your VM and press Enter. It will automatically install everything OpenClaw needs including Node.js. If you are using Ubuntu for the first time, see our OpenClaw Ubuntu setup guide for more detail.
curl -fsSL https://openclaw.ai/install.sh | bashIf you see an error saying curl is not found, run this first and then try again:
sudo apt update && sudo apt install -y curl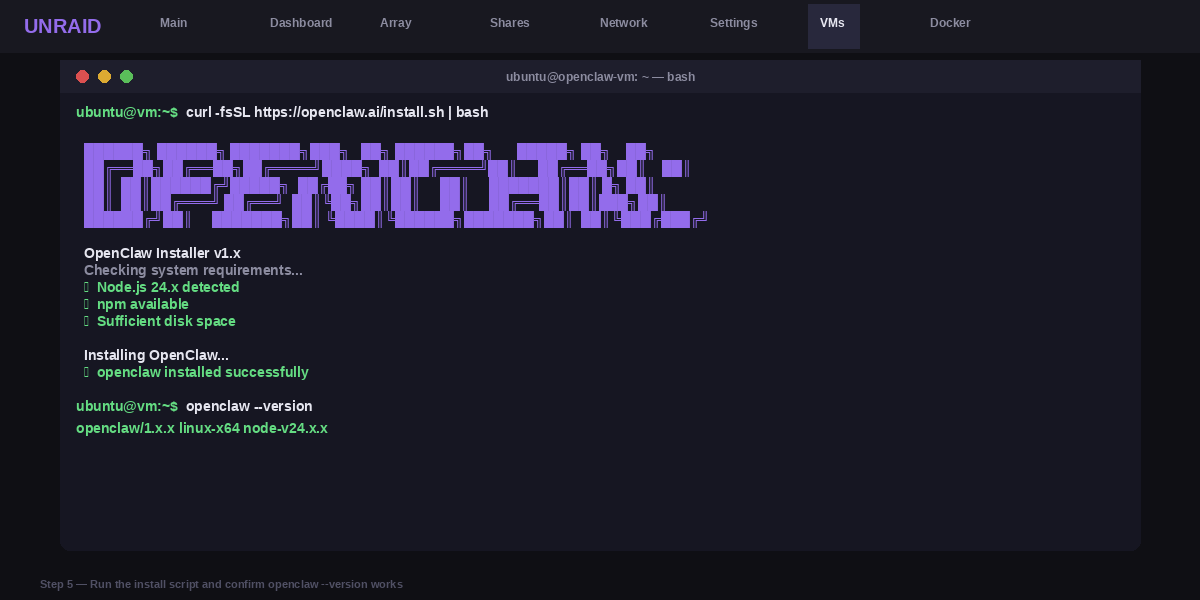
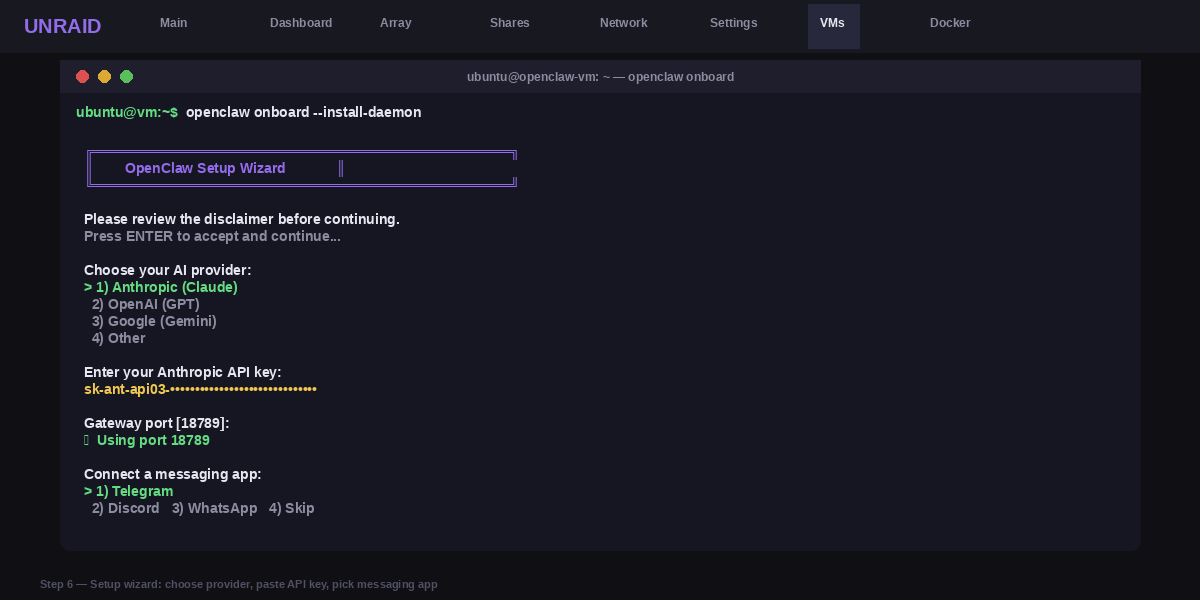
Step 6: Run the Setup Wizard
After installation finishes, run this command to go through the setup. The --install-daemon part at the end makes sure OpenClaw starts automatically every time your VM turns on. Do not remove it.
openclaw onboard --install-daemonThe setup will ask you a few questions:
- Read and accept the disclaimer to continue
- Choose your AI provider (for example Anthropic or OpenAI) and paste your API key
- Press Enter to keep the default gateway port (18789)
- Choose a messaging app to connect - you can pick Telegram, Discord, or WhatsApp
- Follow the steps shown on screen to link your messaging account
Step 7: Check That Everything is Working
Run this command to confirm OpenClaw is running correctly:
openclaw gateway statusIf it shows as running, your AI agent is live. Go to your messaging app and send it a message to test it.

Step 8: Open the Control Dashboard
You can view and manage OpenClaw from a web dashboard. Run this command inside the VM to open it, or go to the URL below from any browser on your home network:
openclaw dashboard
# Or open in your browser: http://your-vm-ip:18789/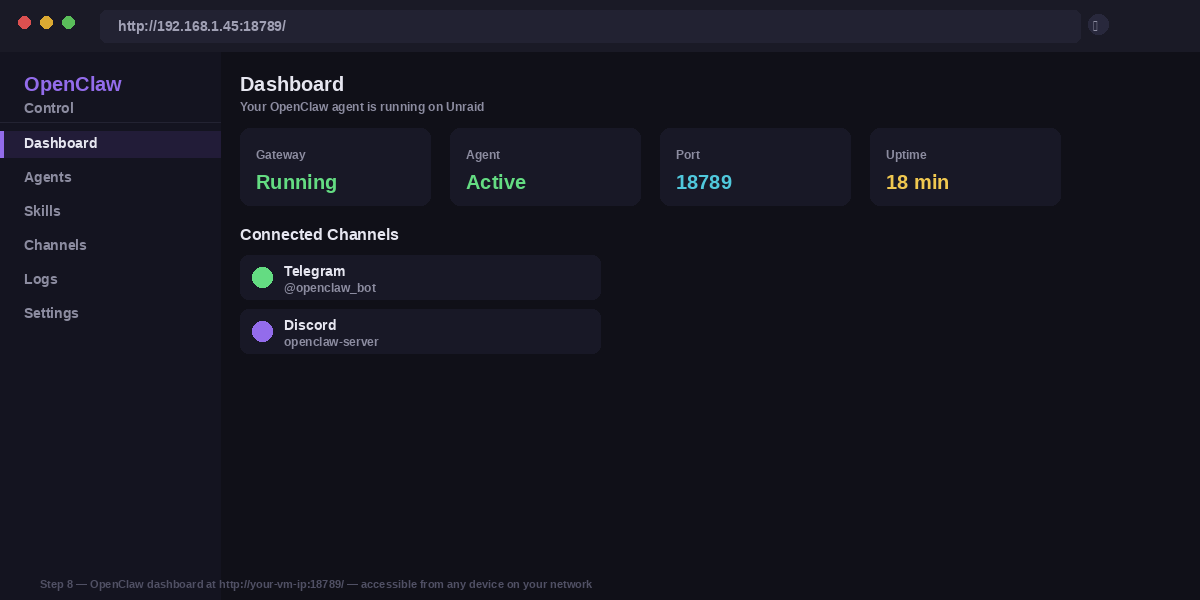
Common Problems and How to Fix Them
VMs Are Disabled and You Cannot Create One
This happens when either virtualization is turned off in your computer BIOS, or the VM Manager in Unraid is set to disabled. You need both to be turned on before you can create a Linux VM.
First go into your computer BIOS and look for Intel VT-x or AMD-V and turn it on. Then log into Unraid, go to Settings, click VM Manager, set Enable VMs to Yes, and click Apply.
# After enabling VMs in Unraid settings,
# go to the VMs tab - you should now see the Add VM button.
The Install Script Fails Because curl is Missing
A brand new Ubuntu VM may not have curl installed. When you try to run the OpenClaw install script, it will fail straight away if curl is not there.
Install curl first with the command below. Once it is installed, run the OpenClaw install script again.
sudo apt update && sudo apt install -y curl

# Now run the OpenClaw installer
curl -fsSL https://openclaw.ai/install.sh | bash
OpenClaw Stops Running After the VM Restarts
If you did not set up the background service during the setup step, OpenClaw will stop as soon as the VM shuts down or restarts. It will not come back on its own.
Run the setup command again and this time make sure to include the --install-daemon part at the end. This tells OpenClaw to keep running automatically every time the VM starts up.
openclaw onboard --install-daemon

# Check that it is running
openclaw gateway status
You Cannot Open the Dashboard from Your Other Devices
By default the OpenClaw dashboard only works from inside the VM itself. Your phone, laptop, or other computers on the same network cannot reach it unless the VM has its own network address.
Make sure your Unraid VM is using Bridge mode for networking. This gives the VM its own IP address on your home network. Find that IP inside the VM and use it to open the dashboard from any device.
# Run this inside the VM to find its IP address
ip addr show

# Then open this in any browser on your network
# http://vm-ip-address:18789/
If you are not sure what is wrong, run openclaw doctor inside the VM. It checks everything and tells you exactly what needs to be fixed.