Ubuntu is one of the most popular environments for running OpenClaw - whether on a local machine, a home server, or a VPS. The OpenClaw Linux installer works natively on Ubuntu 22.04 and 24.04 with no workarounds required. Install Node.js, run one curl command, and your AI agent is live.
This guide covers every step - from system setup to connecting your agent on Telegram or WhatsApp. Want to skip the setup? Ampere.sh runs OpenClaw for you in the cloud.
Ubuntu 22.04 vs 24.04 - Which Version to Use?
Both Ubuntu 22.04 LTS and 24.04 LTS work well with OpenClaw. Here's a quick comparison to help you decide:
TL;DR: If you're setting up a new machine or VPS, go with Ubuntu 24.04 LTS - it has longer support and the latest tooling. If you're already on 22.04, stay on it - everything works perfectly.
Ubuntu Requirements for OpenClaw
Before you start, make sure your Ubuntu machine meets these requirements:
Important: Do not run OpenClaw as root. Use a regular user account with sudo access - this avoids file permission issues and keeps your system more secure.
How to Install OpenClaw on Ubuntu (Step by Step)
Follow these steps in order. The entire process takes about 10 minutes on a fresh Ubuntu install.
Step 1: Update Your System
Start with a clean, fully updated system. This prevents dependency conflicts during the Node.js and OpenClaw installs.
sudo apt update && sudo apt upgrade -y
sudo apt install -y curl wget git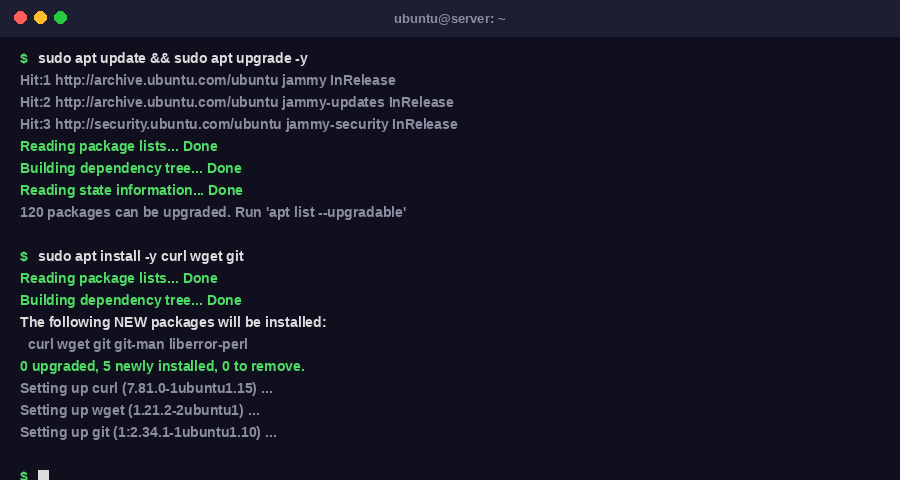
Step 2: Install Node.js 22+ via NodeSource
OpenClaw requires Node.js 22 or higher. The version in Ubuntu's default apt repositories is outdated - use NodeSource to install the correct version:
# Add NodeSource repository for Node.js 22
curl -fsSL https://deb.nodesource.com/setup_22.x | sudo -E bash -

# Install Node.js
sudo apt install -y nodejs

# Verify the version
node --version   # Should show v22.x.x or higher
npm --version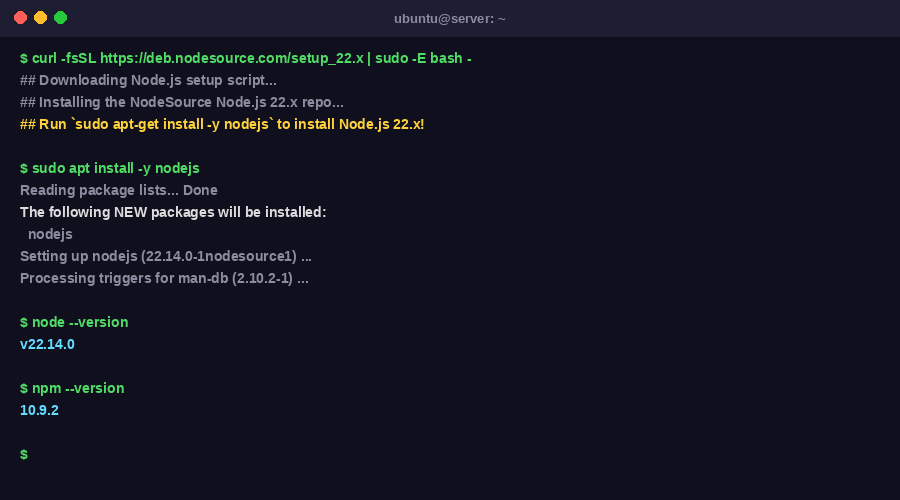
Step 3: Run the OpenClaw Linux Installer
This single command downloads and runs the official OpenClaw installer. It detects Ubuntu automatically, installs all dependencies, and adds OpenClaw to your PATH:
curl -fsSL https://install.openclaw.ai | bashAfter the installer finishes, reload your shell so the openclaw command is available:
source ~/.bashrc

# Verify installation
openclaw --version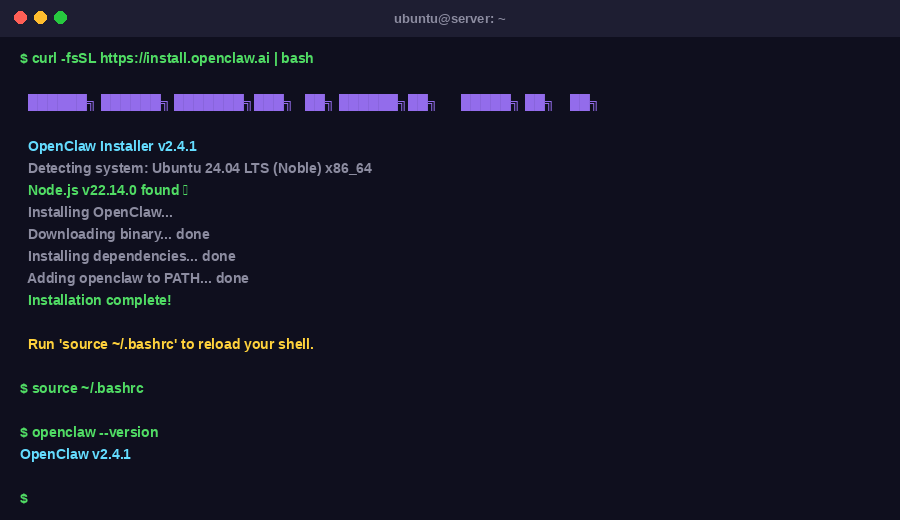
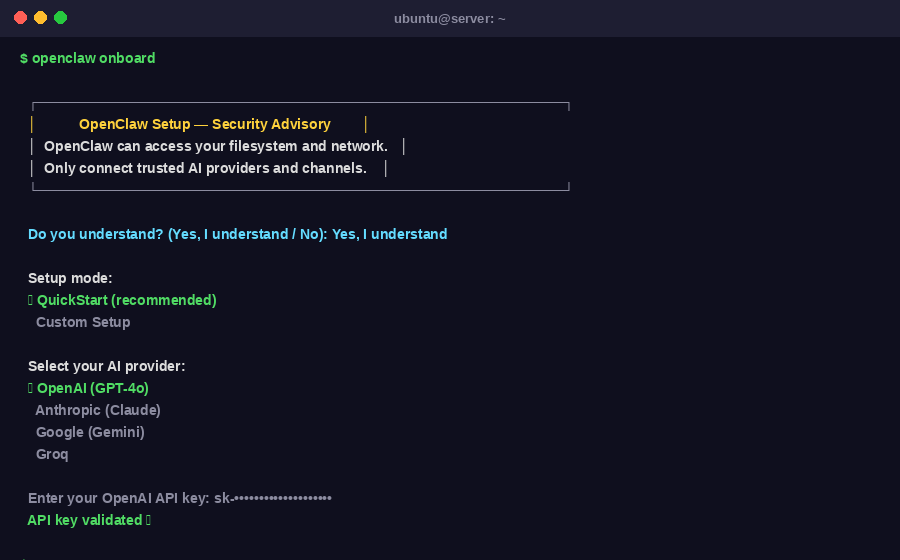
Step 4: Run the Onboarding Wizard
Start the interactive setup. This configures your AI provider, API key, and agent preferences:
openclaw onboardThe wizard will ask you to:
- Read and accept the security advisory - select "Yes, I understand"
- Choose a setup mode - select QuickStart for safe defaults
- Select your AI provider (OpenAI, Claude, Gemini, or others)
- Enter your AI provider API key
- Choose whether to install skills - select No for now (you can add skills later)
- Enable bash shell completion when prompted
Step 5: Connect a Messaging Channel
After onboarding, connect your agent to a messaging app so you can chat with it. The two most common options are:
Option A: Telegram
- Open Telegram and search for @BotFather
- Send
/newbotand follow the prompts to name your bot - Copy the bot token BotFather gives you
- In your terminal, run:
openclaw connect telegram - Paste the token when prompted - your agent is now live on Telegram
Option B: WhatsApp
- Run:
openclaw connect whatsapp - A QR code will appear in your terminal
- Open WhatsApp on your phone → Settings → Linked Devices → Link a Device
- Scan the QR code - your agent is connected
Step 6: Enable Auto-Start with systemd
By default, OpenClaw stops when you close your terminal. Register it as a systemd service so it starts automatically on every reboot:
# Install OpenClaw as a systemd daemon
openclaw onboard --install-daemon

# Verify the service is running
systemctl status openclaw
You should see Active: active (running). Your agent now runs 24/7 in the background - even after reboots.
Step 7: Secure the Port with UFW
OpenClaw runs a local dashboard on port 18789. If your Ubuntu machine is publicly accessible (VPS or home server), block this port from external access:
# Allow SSH access
sudo ufw allow ssh

# Block OpenClaw dashboard from the internet
sudo ufw deny 18789

# Enable firewall
sudo ufw enable

# Confirm rules
sudo ufw status
The dashboard remains accessible from your local machine at http://localhost:18789. For full hardening steps, see the OpenClaw security guide.
Real Use Cases of OpenClaw on Ubuntu
Once your agent is live, here's what people actually use OpenClaw for on Ubuntu:
Server Monitoring via Chat
Message your agent on Telegram to check CPU usage, disk space, memory, or uptime - without opening an SSH terminal.
Scheduled Automations
Run daily backups, cleanup scripts, or report generation automatically using Ubuntu's cron and OpenClaw skills.
Personal Dev Assistant
Ask your agent to review code, explain error logs, write bash scripts, or summarize documentation from any device.
Custom Alerts and Notifications
Set up alerts for website downtime, high server load, or file changes and get instant Telegram or WhatsApp messages.
Research and Summarization
Ask your agent to search the web, summarize articles, or pull content from URLs and get results delivered straight to your chat.
File and Data Management
Organize folders, rename files in bulk, process CSVs, or summarize documents through a simple chat command.