Mac M1 is one of the best machines for running OpenClaw locally. It is fast, uses very little power, and handles agent workloads well.
OpenClaw runs natively on Apple Silicon - no Rosetta, no workarounds. Just install and go. If you want to skip local setup entirely, Ampere.sh gets you running in 60 seconds.
What You Need Before You Start
| Requirement | Details |
|---|---|
| Mac | Any Mac with M1, M2, M3, or M4 chip |
| macOS | Monterey 12.0 or newer |
| RAM | 8 GB minimum - 16 GB recommended |
| Node.js | Node 22 LTS or newer (installer handles this automatically) |
| API key | From Anthropic, OpenAI, Google, or another supported provider |
| Sleep setting | Set Mac to never sleep so the agent stays online |
How to Install OpenClaw on Mac M1
Step 1 - Run the Installer
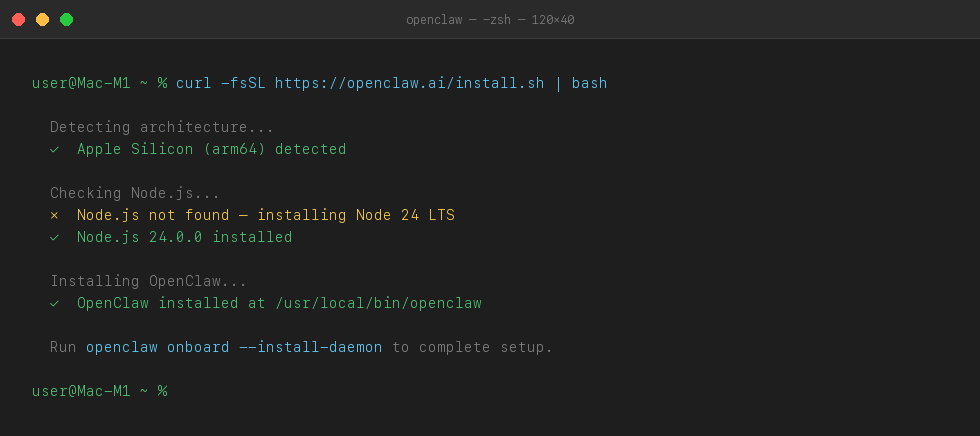
Open Terminal and run this command. It installs OpenClaw and everything it needs, including Node.js if it is not already on your Mac.
curl -fsSL https://openclaw.ai/install.sh | bashThe installer detects Apple Silicon automatically. No extra flags or settings needed.
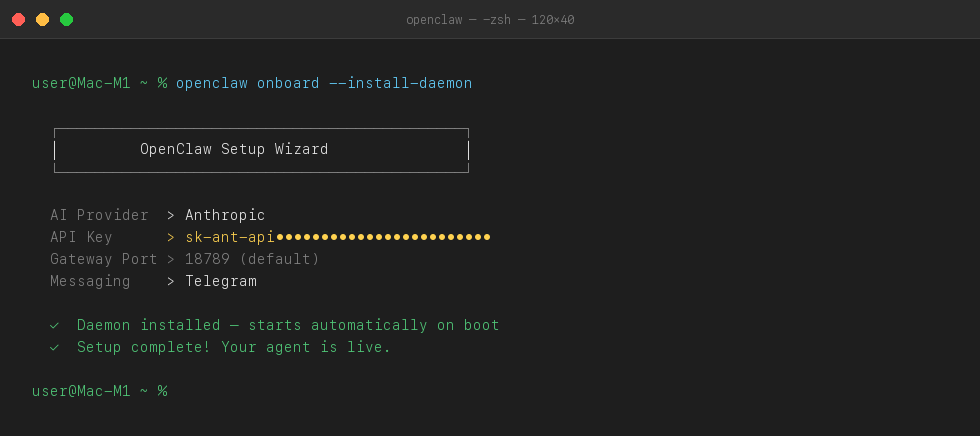
Step 2 - Run Onboarding
After the install finishes, run the setup command. The --install-daemon flag makes OpenClaw start automatically every time your Mac boots up.
openclaw onboard --install-daemonThe setup will ask you to:
- Accept the disclaimer
- Choose your AI provider and paste your API key
- Confirm the default gateway port (18789)
- Connect a messaging app - Telegram, Discord, WhatsApp, or others
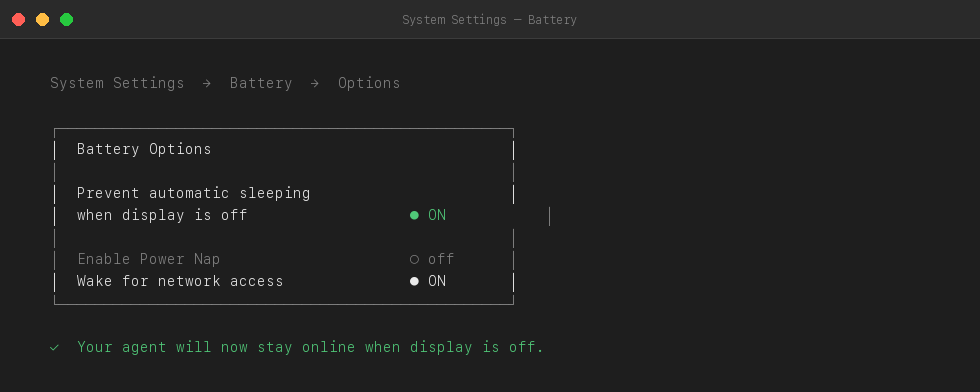
Step 3 - Prevent macOS from Sleeping
This is the most important step for 24/7 uptime. macOS will put your Mac to sleep when idle and kill the agent. Turn this off in System Settings.
- Open System Settings
- Go to Battery → Options
- Turn on Prevent automatic sleeping when display is off
Step 4 - Check That It Is Running
Confirm OpenClaw is active with this command:
openclaw gateway statusYou can also open the dashboard in your browser to see your agent live:
openclaw dashboard
# Or visit: http://127.0.0.1:18789/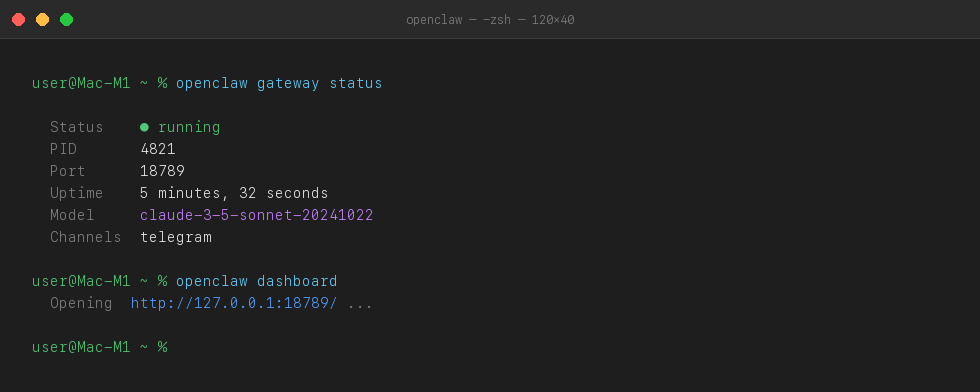
Common Problems and How to Fix Them
openclaw: command not found after install
This happens when your shell does not know where the OpenClaw binary is. On Apple Silicon, the PATH is not always updated automatically after install.
Run source ~/.zprofile in Terminal, then try the openclaw command again. If it still fails, restart Terminal completely.
source ~/.zprofile

# If still not found, add it manually
export PATH="$(npm prefix -g)/bin:$PATH"
Agent goes offline after screen locks
macOS puts the machine to sleep when idle by default. This kills the OpenClaw gateway even when the daemon is installed.
Go to System Settings → Battery → Options → turn on Prevent automatic sleeping when display is off. This keeps your agent online when the screen is off.
# Confirm the gateway is running after enabling the setting
openclaw gateway status
Invalid API key error
OpenClaw cannot connect to your AI provider. This usually means the key was entered incorrectly or has been revoked.
Re-run onboarding to enter your API key again from scratch.
openclaw onboard --install-daemonNot sure what is broken
Sometimes multiple things go wrong at once - wrong Node version, bad config, PATH issues, gateway not running. Hard to know where to start.
Run openclaw doctor. It checks your full setup and tells you exactly what needs fixing.
openclaw doctorIf you are not sure what is wrong, run openclaw doctor. It checks everything and tells you exactly what needs to be fixed.
Mac M1 Local Setup vs Ampere.sh
Mac M1 is a solid choice for running OpenClaw locally. Here is how it compares to running it on Ampere.sh.
| Feature | Mac M1 (Local) | Ampere.sh |
|---|---|---|
| Setup time | 10-20 min | 60 seconds |
| Works when Mac sleeps | ❌ Goes offline | ✅ Always on |
| Errors to debug | A few possible | None |
| Maintenance needed | Manual updates | Fully managed |
| True 24/7 uptime | Only if Mac stays on | ✅ Yes |
| Free to start | API costs only | ✅ Free credits |
Want to Run OpenClaw on Mac M1 Without Any Local Setup?
Local setup on Mac M1 is straightforward - but your agent is tied to your machine. If your Mac sleeps, restarts, or loses power, the agent goes offline.
Deploy on Ampere.sh instead:
- No local install - no Node.js, no config files, no sleep settings
- Free credits to start - no credit card required
- Runs on cloud servers that never go offline
- Your agent stays live even when your Mac is shut down